Table of contents
- 🌠 GIT
- 🔰 Introduction to version control system.
- VCS(VERSION CONTROL SYSTEM) is used to
- DIFFING FILES
- In VCS, we can make edits to multiple files and treat that collection of edits as a single change which is commonly known as a commit.
- Installing Git
- Git Basics
- Tracking Changes To Our Files :
- The BASIC GIT WORKFLOW
- ANATOMY OF A COMMIT MESSAGE
- We'll learn about using git locally in our next blog.
🌠 GIT
is a Version Control System created in 2005 by Linus Torvalds.
- Torvalds while developing Linux(an OS) as an hobby wanted various developers all over the world to contribute to the project. For that to happen geographically distributed programmers who were contributing to it by writing a whole bunch of code needed a medium for collaborating.
🔰 Introduction to version control system.
VCS(VERSION CONTROL SYSTEM) is used to
They retrieve the past versions of our file or directory and let's us see who changed what files. In simple words it can Undo the changes done to a piece of code and roll back to the previous versions of code. After doing proper testing of the new code,then we implement the new code.
This can be used as an medium for multiple people to collaborate on the same projects together.
VCS keeps historical copies of the code which in other words means that VCS helps us to keep track of the changes in our files. We can know who made the changes and when
DIFFING FILES
If there are two copies of the similar code and we want to check the difference between them then we can do this by diffing two files
diff file1.x file2.xIf the output of the
diffcommand shows a lesser than<symbol followed by a line of code then it means that a line was removed from the first file(file1.py).Else, if it shows a greater than
>symbol followed by a line of code then it means that the line was added to the second file(file2.x)
//TYPE THE FOLLOWING COMMANDS IN YOUR TERMINAL
touch file1.txt  //touch command is used to create a file in linux systems.
touch file2.txt
//NOW ADD SOME CONTENT TO FILE1 AND COPY THAT TO FILE2
//MODIFY FILE2 WITH MINOR CHANGES.
cat file1.txt  //cat command is used to display the entire file.
cat file2.txt
diff file1.txt file2.txt //You can view the changes in both the files
Now if we want more information regarding the changes in our files, then we can add the -u flag to the diff command
diff -u file1.x file2.x
Note : You can explore various other commands such as
wdiff - highlights the words that are changes in a file.
meld - provides two- and three-way comparison of both files and directories, and has support for many popular version control systems.
KDiff3 - a GUI diff tool that allows you to create a diff of two/three files and selectively choose which lines make up the merged file.
vimdiff - starts Vim on two (or three) files. Each file gets its own window. The differences between the files are highlighted. This is a nice way to inspect changes and to move changes from one version to another version of the same file.
APPLYING CHANGES
- We can send a
diffwith the changes to a piece of code so that someone can see the modifies code (How it looks like).
diff -u file1.x file2.x > change.diff ( ">" is the redirection operator which redirects the output of diff command to the change.diff file )
The generated file is referred to as the diff file or the patch file. It includes all the changes between the old file and the new file plus the additional context needed to understand the changes and to apply those changes back to the original file.
Now if the person receiving the diff file wants to apply the changes to the original file then he can read the diff file and manually got through the file and apply the modifications. But, this is way too tidious for a person. So, he can make use of the patch command.
patch originalFile.x < change.diff
patch takes the file generated by the diff command and applies the changes to the original file.
In VCS, we can make edits to multiple files and treat that collection of edits as a single change which is commonly known as a commit.
Whenever you write a commit message after making a change, it's as if the current version of yourself is explaining your decisions to a future version of you or others in the future who might work on the same scripts ans configurations in the future.
In VCS, the author of a commit can record why the change was made and also the bugs & issues that were fixed by this change.
Files are usually organiseds in repositories which contains separate software projects or just group of all related code. A Repository can be thought as a folder that contains all the files that are related to a particular project.

If there are a lot of people in developing software, some developers may have access to only some of the repositories .
A single repository may have as little as one person using it or it can go upto thousands of contributors using the same repository.
VCS may be used to store configuration files, documentation, data files or any other content that we may need to track. VCS is useful to track text files which may be compared with
diffand modified withpatch.
Within a VCS, project files are organised in centralized locations called repositories where they can be called upon later.
- As we discussed prior, VCS is used to retrieve the past versions of our file or directory and let's us see who changed what files. In simple words it can
Undothe changes done to a piece of code and roll back to the previous versions of code. After doing proper testing of the new code,then we implement the new code.
Git has a distributed architecture . This means that every person contributing to a repository(a centralized area or in simple terms, a folder containing all the files related to the project) has full copy of the repository on their own machines.

Collaborations can share and pull in changes that others have made as they need and because their repositories are all local to their systems, most operations can be done real easy and fast.
Git can work as a standalone program, as a server and as a client.
Git can be used on a single machine without any internet connection.
Git clients can communicate with Git servers over the network using HTTP,SSH or git's own special protocol.
We can share our work with others by hosting a code on public servers like
GithuborGitlab.
Official git website : git-scm.com (scm here stands for source control management which is another acronym for VCS.)
Installing Git
If you're downloading in windows then the package manager is chocolatey, for Linux it's apt or yum and for macos it's Homebrew. Install git through package management system. In case you're using Linux, type the following commands in your terminal :
sudo apt install git
OR,
sudo yum install git
If you have it preinstalled in your system then you can check by running the command :
git --version

On installing git in windows, it comes preloaded with an environment called MinGW64 . The environment lets us operate on windows with the same commands and tools available on Linux.
Git Basics
VCS tracks who made which changes, for this to work we need to tell git who we are. We can do this by using the git config command and then setting the values of user.email and user.name to our email and name.
git config --global user.email "email@gmail.com"
git config --global user.name "yourName"
We use the `--global` flag to state that we want to set this value for all git repositories that we'd use. We can also set different values for diffent repos.
To check the name, email which we set, run the command:
  git config --global user.name
  git config --global user.email
2 Ways to start working with a git repository :
1. We can create one from scratch using the git init command.
2. We can use the git clone command to make a copy of a repository that exists somewhere else. So, to start off with git :
I. Create a new directory.
On installing git in windows, it comes preloaded with an environment called
MinGW64. The environment lets us operate on windows with the same commands and tools available on Linux.mkdir git
II. Inside the directory, create a git repository.
cd git
git init // this command initialises an empty Git repository in
//     /home/user/git/.git/
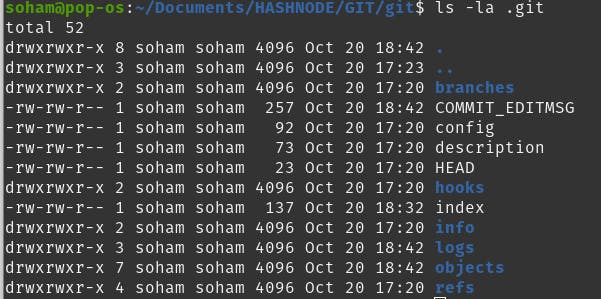
We can check the directory .git exists or not using the command
ls -lals -la // This command lists files that start with a dot.We can use the
ls -l .gitto see inside it. The thing that we get after entering this command is called aGit directory. You can think of it as a database for your Git project that stores the changes and the change history .
It contains a bunch of files and directories. We won't touch any of the files directly. We'll always interact with them through git commands. So, whenever you run the git init to create a new repository, a new git directory is initialized. The area outside the git directory is the
working tree. The working tree is thecurrent versionof your project where we perform all modifications. This working tree will contain all the files that are currently tracked by git and any new files that we haven't yet added to the list of track files.Git directory contains
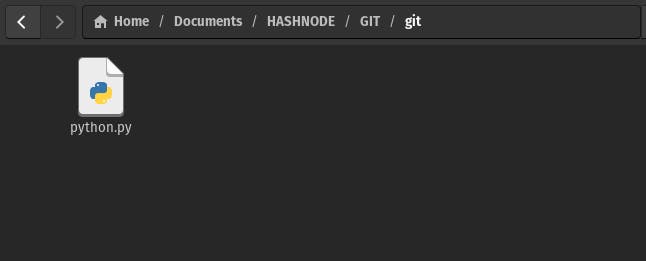
the change historyand the working tree contains the current versions of the file.1. Create a file python.py in your current working tree using the following command from your terminal.
touch python.py
- Python program for
binary search# Python 3 program for recursive binary search. # Modifications needed for the older Python 2 are found in comments. # Returns index of x in arr if present, else -1 def binary_search(arr, low, high, x): # Check base case if high >= low: mid = (high + low) // 2 # If element is present at the middle itself if arr[mid] == x: return mid # If element is smaller than mid, then it can only # be present in left subarray elif arr[mid] > x: return binary_search(arr, low, mid - 1, x) # Else the element can only be present in right subarray else: return binary_search(arr, mid + 1, high, x) else: # Element is not present in the array return -1 # Test array arr = [ 2, 3, 4, 10, 40 ] x = 10 # Function call result = binary_search(arr, 0, len(arr)-1, x) if result != -1: print("Element is present at index", str(result)) else: print("Element is not present in array")**2.**To make git track our file, we'll add it to the project using
git addcommand, passing the file that we want as a parameter.git add python.pyBy using git, we've added our file to the staging area.
- STAGING AREA(index) : a file is maintained by Git that contains all of the information about what files and changes are going to go into your next commit. Staging area is also known as
index.3. Now use the
git statuscommand to get some information about thecurrent working treeandpending changes.
- this means that our change is currently in the staging area.
4. Now to get the changes commited into the ".git " directory, we use the
git commitcommand.git commit
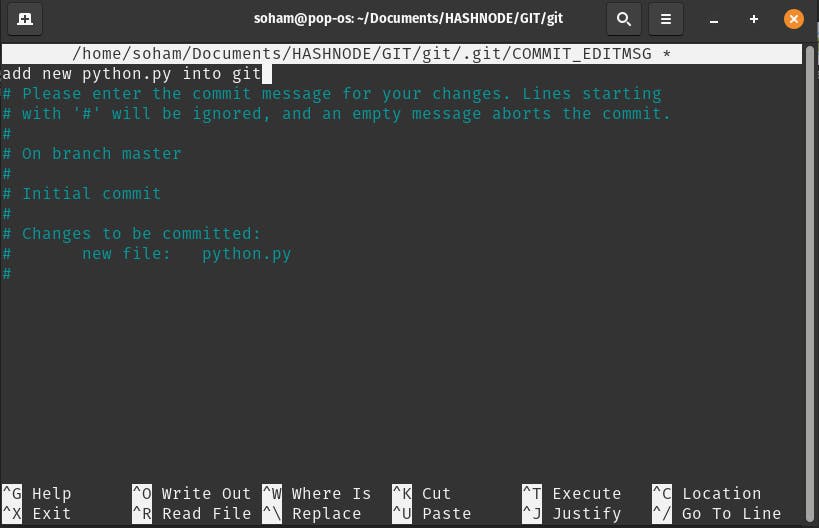
after the git commit command is executed, an editor will open in your linux system. For me a nano editor is opened by default as I'm using debian-based linux distro(Pop OS) in my system.
Write a simple commit message. ![git_commitMSG.png]
After writing the commit message, Press Ctrl+O ,followed by ENTER, followed by Press Ctrl+Xto save your commit message in nano editor and exit it.
We can also pass the commit message using the
-mflag, stating that we added periods(full stop) at the end of the sentences.git commit -m 'new commit'
Tracking Changes To Our Files :
When we operate with Git, our files can be either tracked or untracked. Each track file can be in one of the three main states :
modified
staged
committed
I. If a file is in the
modified state, it means that we've made changes to it that we haven't committed yet. > - The changes could be adding, modifying or deleting the contents of the file. Git notices anytime we modify our files. But it won't store anything until we add them to the staging area.**II.**So, the next step is to
stagethose changes. When we do this ourmodified filebecomes staged files. In other words the changes to those files are ready to be committed to the project. All files that are stages will be part of the file that are to be committed.III. The file then gets committed and the changes made to it are safely stored in a snapshot(copy of the file is stored) to the git directory.

A file tracked by Git will be first modified.
Then It becomes staged when we mark those changes for tracking.
Finally it will get committed when we store those changes in the VCS.
The BASIC GIT WORKFLOW
All the files we want to manage with GIt must be a part of a Git repository .
We initialise a new repository by running the git init command in any file system directory.
Use the following command to check our current configuration.
git config -l
user.emailanduser.namewill appear in public commit logs if you use a shared repository. For privacy reasons, you might want to use different identities when dealing with your private work and when submitting code to public repositories.
We want git to track our files so we'll use
git add filename.extension. It will also change a file in the modified state to staged state.To initiate a commit of staged files, we issue the
git commitcommand.Git will only commit changes that have been added to the staging area. Untracked files or modified files that weren't staged will be ignored. Calling
git commitwith no parameters will launch a text editor(default editor)Edit commit message using nano(default editor for my linux distro).
If the commit message is empty, then the commit will abort.
ANATOMY OF A COMMIT MESSAGE
I. Company might have specific rules for writing commit messages.
II. A commit message is generally broken up into a few sections.
The first line is a short summary of the commit, followed by a blank line.
This is followed by a full description of the changes which details why they're necessary and anything that might be especially interesting about them.
Ex. of a good commit message :
Summary (50 character long)
\n
descriptive information(72 character long each line)
\n
If more information is needed to explain the change, more paragraphs can be added after blank lines with links to issues, tickets or bugs.
III. git log is used to display git messages.
git log
This command will do any line wrapping for us, which means if we don't stick to the recommended line wrapping, long commit messages will run off the edge of the screen and be difficult to read.
#hashtag is a comment in commit message,i.e, these won't be included in the commit message.
Git shows them to us whenever we're writing a commit message as a reminder of what files we're about to commit.
